This article provides operating instructions and programming guidance for various versions of dust collection remotes and receivers. It details power buttons, LED indicators, battery use, and radio frequency range. It explains how to identify remote versions for different machine models and outlines specific programming steps for junction box receivers, V2/V3/V4 receivers, and T33308/T33310 models, including pairing and erasing remotes.
In this article:
Identifying your remote version
Basic Operating Instructions:
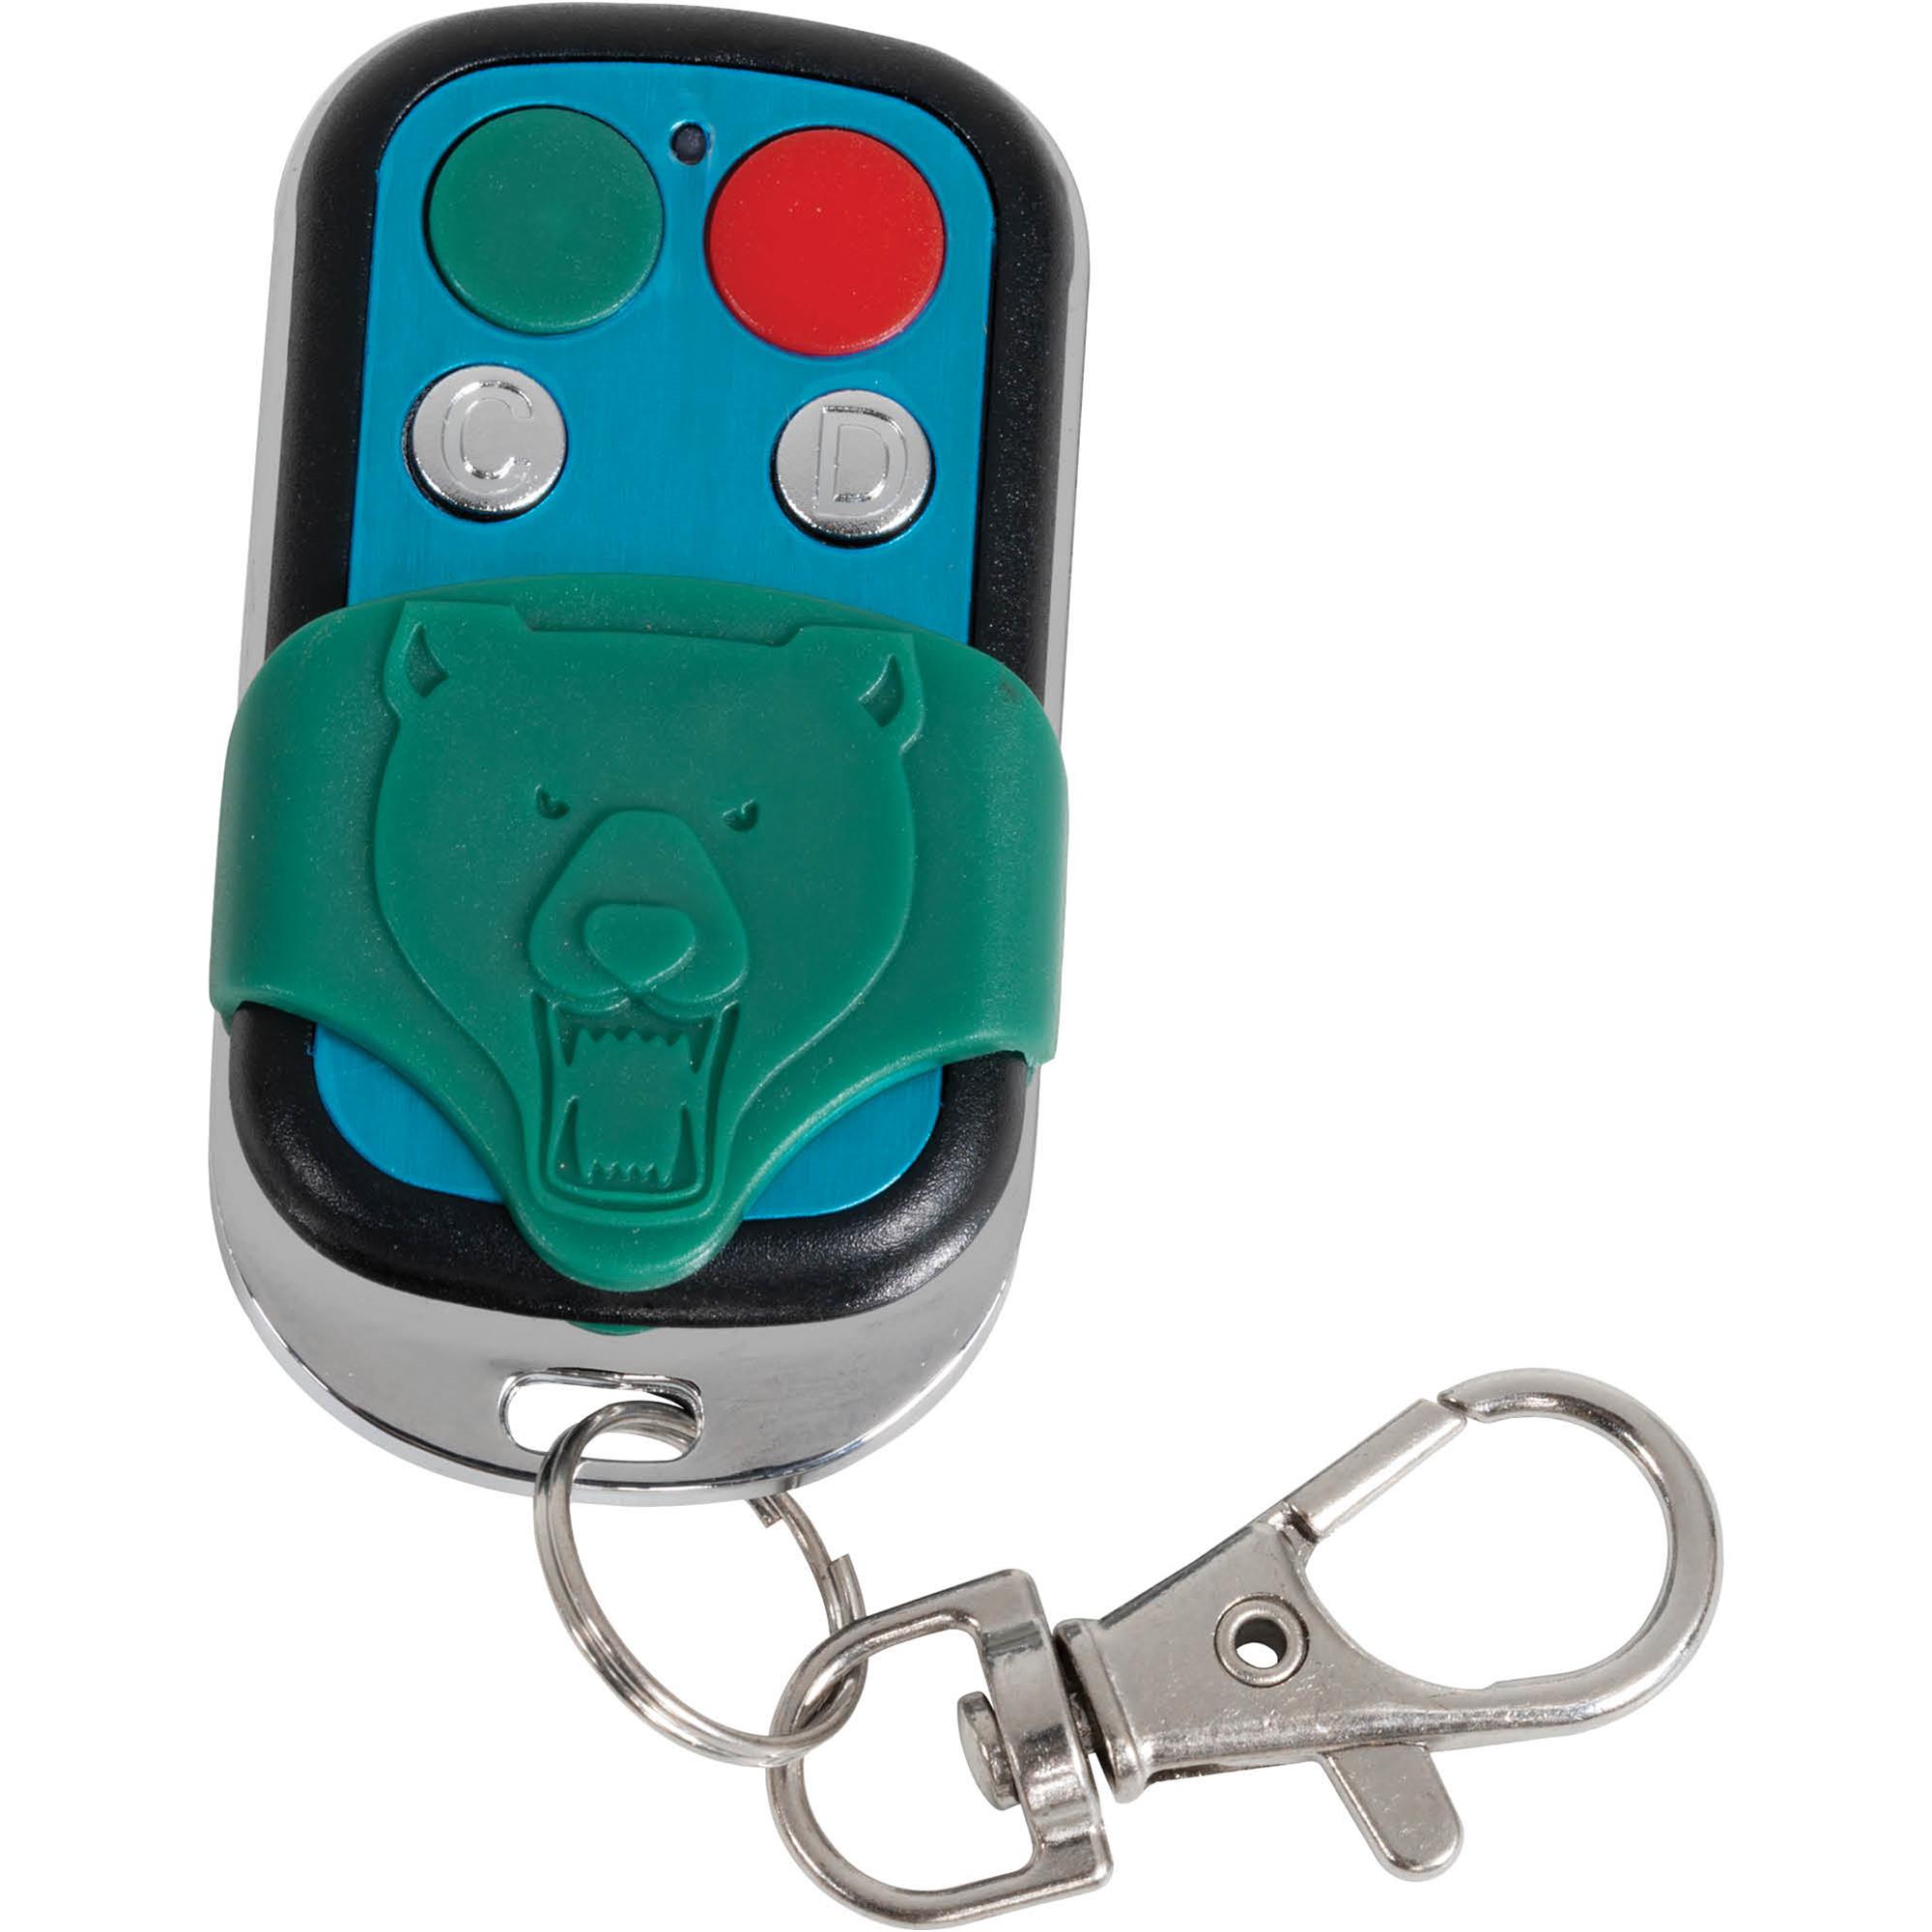
Power Buttons
Green button = Motor ON
Red button = Motor OFF
Indicator Light
The remote’s LED should flash red when a button is pressed.
A weak battery may still light the LED, but may not have enough power to operate the motor.
Battery
Uses one 12V A27 battery.
Replace the battery if the remote does not start or stop the machine.
Range & Operation
Operates on radio frequency with up to 60 feet of range.
Does not need to be aimed directly at the control box.
Identifying Your Remote Version
There are currently four different versions of dust collection remotes and receivers for our machines. Programming instructions are based on the receiver. You must identify which version receiver you have to ensure the correct steps are followed.
Models: G0944, G0944HEP
V1/V2 - 4-Button Remotes
Applies to machines with controls on the motor junction box cover
These follow the junction box receiver programming instructions. Jump to these instructions here.
Models: G0860, G0861, G0862, W1867, W1868, W1869
These have different remotes and receivers depending on the version.
V1/V2 - 2-Button Remotes

V1 - 2-Button Remote Receiver
Applies to machines with a remote receiver in the mag switch.
These remotes and receivers are non-programmable. This can be confirmed by checking the remote and receiver having matching codes.
- If you have this remote and receiver, you will need to upgrade both the receiver (P0860049V3-4) and the remote (P0860067V3) and use the instructions for that receiver (Jump to these instructions here).
V2 - 2-Button Remote Receiver
- Applies to machines with a remote receiver in the mag switch. These remotes and receivers are programmable.
- If you need to replace the remote, the 2-button remote has been discontinued. You will need to upgrade to the 4-button remote (P0860067V3).
- Your existing receiver will work with the new remote and uses the same programming instructions as the original 2-button remote.
- These follow the V2/V3/V4 Receiver Programming Instructions. Jump to these instructions here.
V3 - 4-Button Remotes
V3 Receiver
- Applies to machines with a remote receiver in the mag switch.
- These follow the V2/V3/V4 Receiver Programming Instructions. Jump to these instructions here.
V4 Receiver (G0860, G0861, W1867, W1868 only)
- Applies to machines with controls on the motor junction box cover.
These follow the junction box receiver programming instructions. Jump to these instructions here.
T33308/T33310
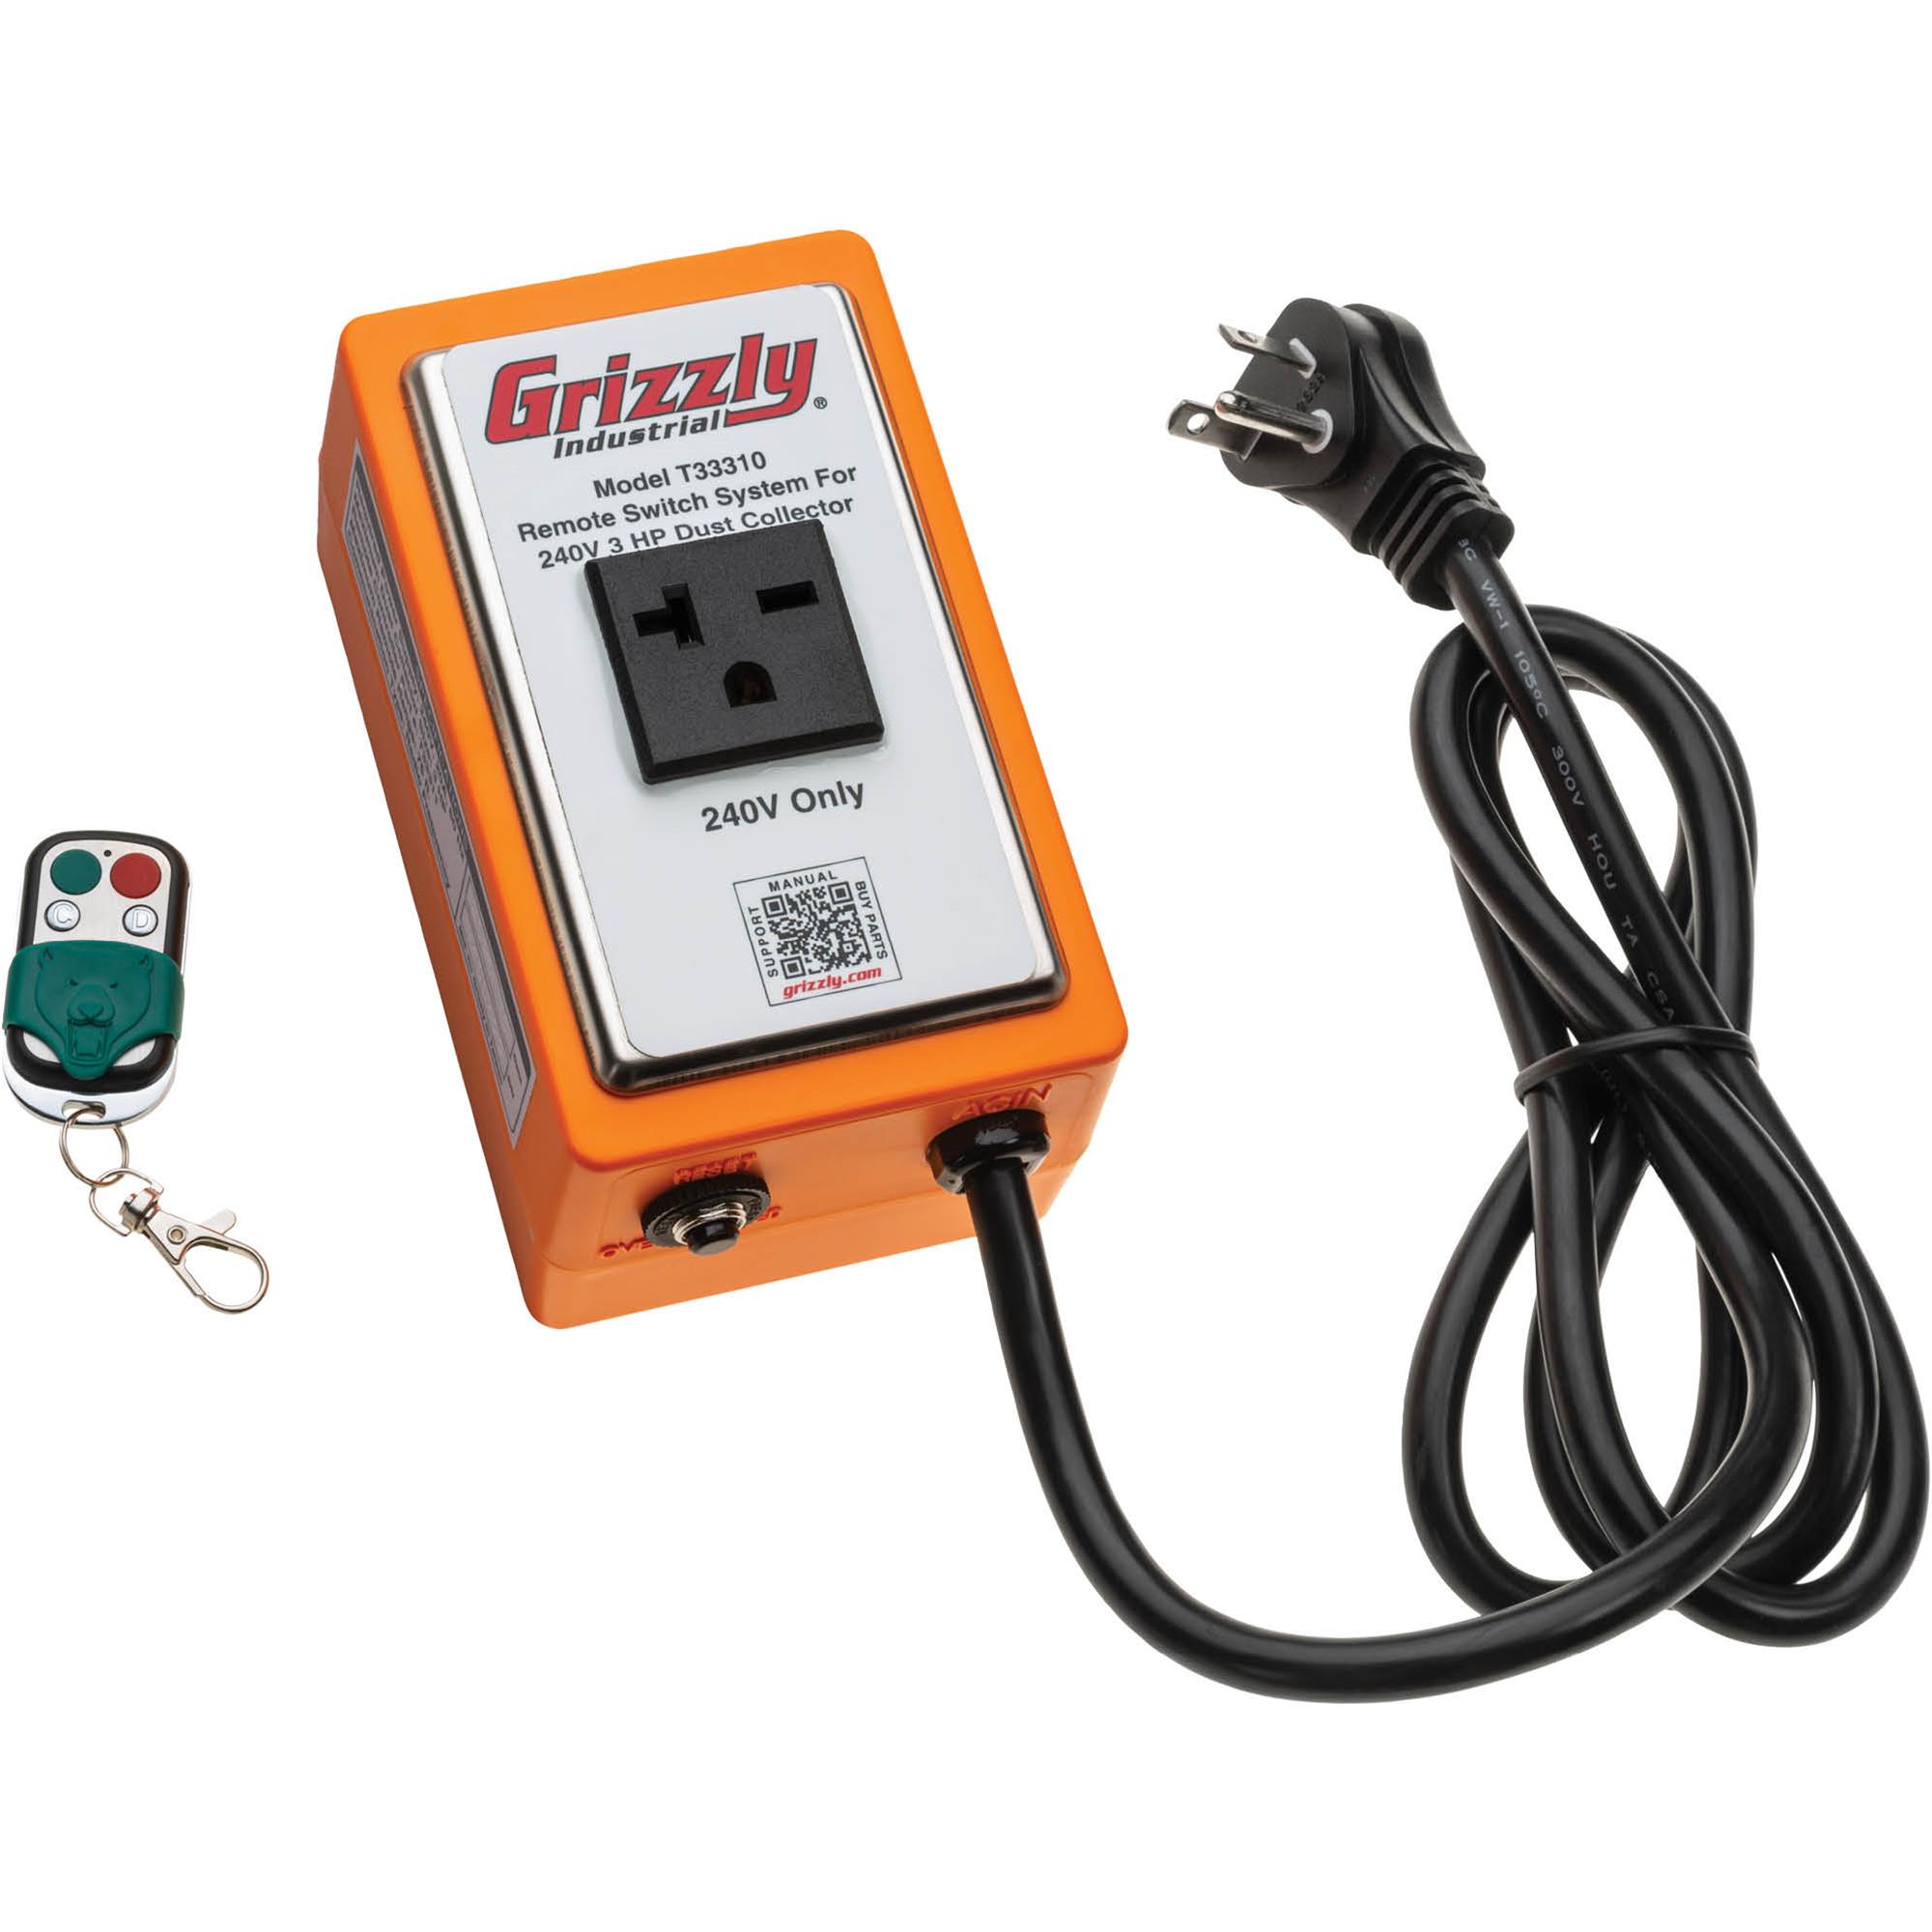
- These remotes (T33311) will follow the T33308/T33310 programming instructions.
- Jump to these instructions here.
Programming Instructions
Once you've identified which remove/receiver you have, you'll use the corresponding instructions to program your remote. If you still need to determine which remote/receiver you have, see HERE.
Junction Box Receiver Programming
Confirm the machine is plugged in and switched off before programming.
-
Remove the junction box cover to access the set button on the circuit board/remote receiver.
-
To safely remove the cover, use an insulated screwdriver or other non-conductive tool to press the button.
Using an insulated screwdriver or non-conductive tool is important to keep you protected from live voltage.
-
Press and hold the black set button. You will hear 2 beeps. Continue holding.
While holding the set button, press and release any button on the remote. You will hear 3 beeps. The pairing is complete.
Release the set button and test the remote.
V2/V3/V4 Receiver Programming Instructions
Press and hold the program button on the receiver until the LED starts flashing. Keep holding the button.
-
Press and release the On or Off button on the remote.
If programming multiple remotes, press the On or Off button on each remote you want paired.
When the LED on the receiver stops flashing, release the program button.
Test the remote(s) to confirm programming is complete.
To erase all remotes:
Press the program button until the LED starts flashing, then release it.
This clears all remotes. You cannot add or remove remotes individually—any new remotes must all be programmed at the same time.

T33308/T33310 Programming Instructions
- Press and hold the programming button on the side of the switch box. You will hear 2 beeps, continue to hold the set button.
- While holding the set button on the switch box, press and release any button on the remote control. You will hear 3 beeps. The pairing is complete.
